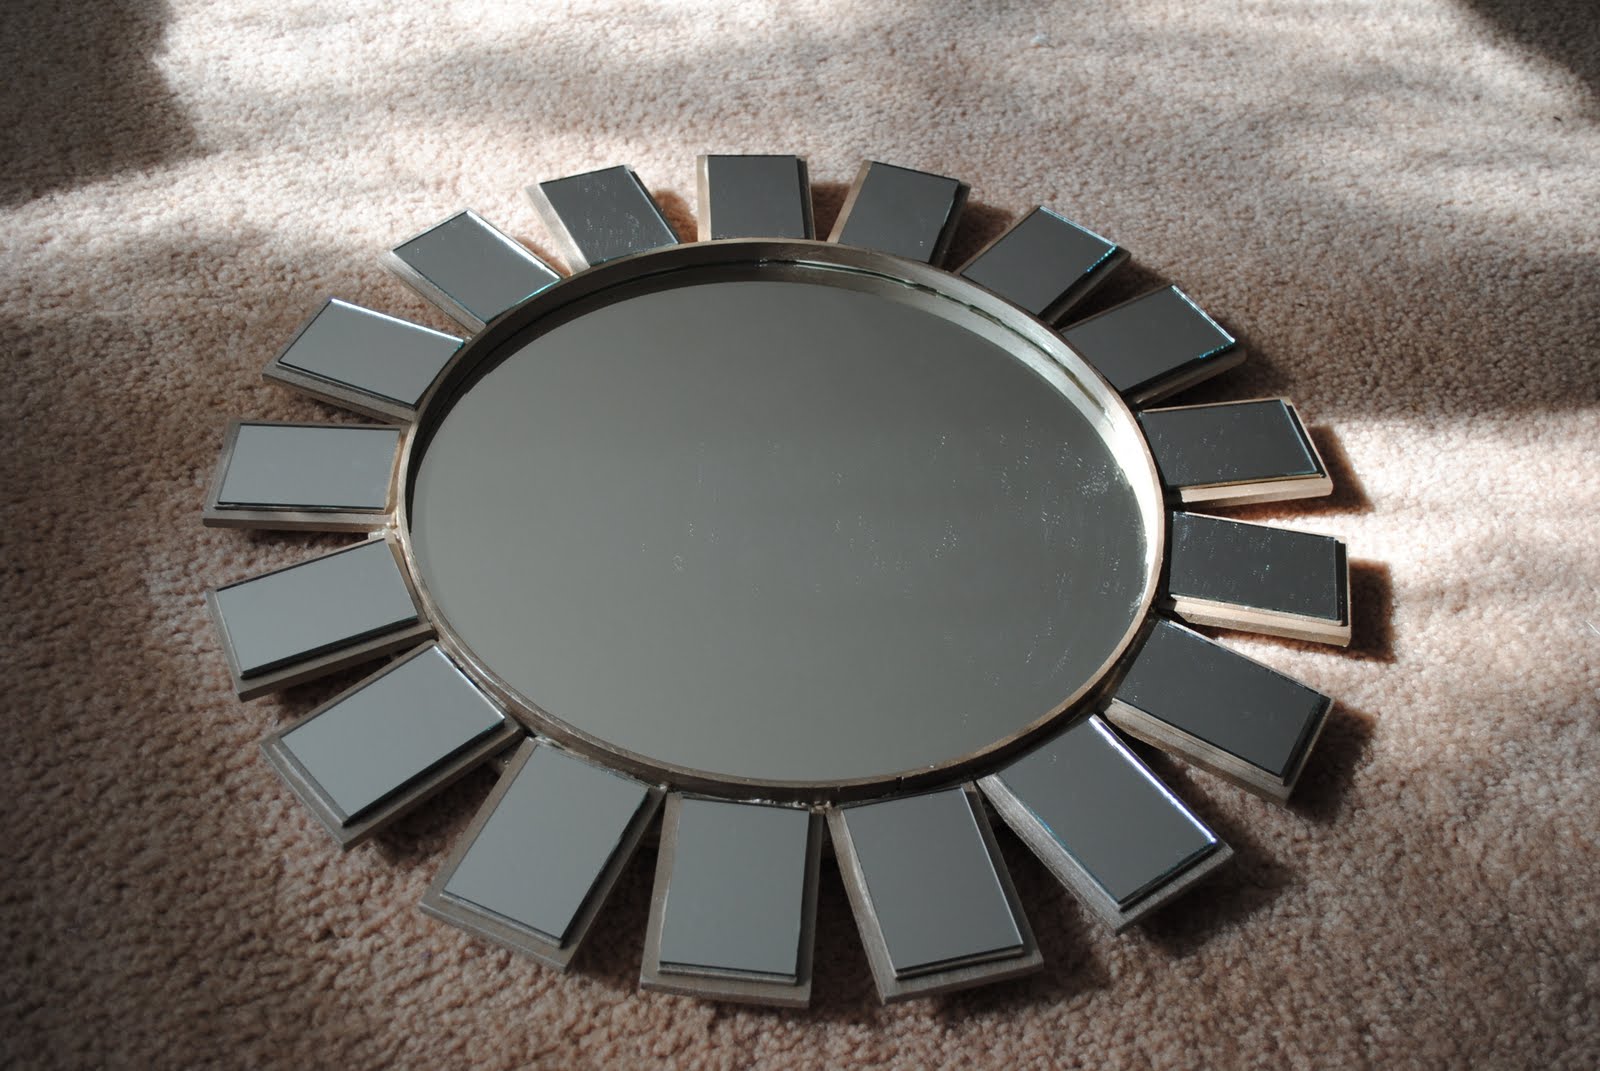
As I mentioned this morning I have been busy working on a little diy mirror project, which turned out like this.
It all started when I came across these small rectangle mirrors. They are small little 2x3 inch mirrors. When I saw them my head started racing and I knew exactly what I was going to use them for.
I had seen this gorgeous Devon mirror on zgallerie a while back, but the $200 price tag prevented me from ordering it. And besides, I love DIY projects, but wasn't too sure about how this one was going to turn out.
I was going to try and make my own Devon mirror. I tried to figure out how to do it in so many ways and after a couple of weeks of discussing, debating and procrastinating, I finally finished it last night. I am quite happy with how it turned out. I couldn't have done this project without seeing the
Paint Stick Sunburst Mirror that the extremely talented Kate of
Centsational Girl did. You should check out her mirror. It looks gorgeous.
So here is the "how to" for the mirror in case you want to make your own DIY mirror.
What you will need:
- 15 inch round wooden circle
- 14 inch mirror
- 14 inch embroidery hoop
- 17 -2x3 wooden tags (these are small little wood pieces, unpainted, for .49 cents at Michaels)
- 17- 2x3 inch mirrors
- 17- 2.5x3.5 inch wood pieces ( I bought a long piece of wood from Home Depot and cut them to my needed length)
- gorilla glue
- craft paint
To get the 2.5x3.5 inch pieces of wood, I needed to buy a 1/4"x2.5"x4' and it was $3.49. I needed two of those. From that I measured and cut the length to 3.5 inches.
I painted all my pieces of wood in a light gold color. I also painted my embroidery hoop and wood circle.
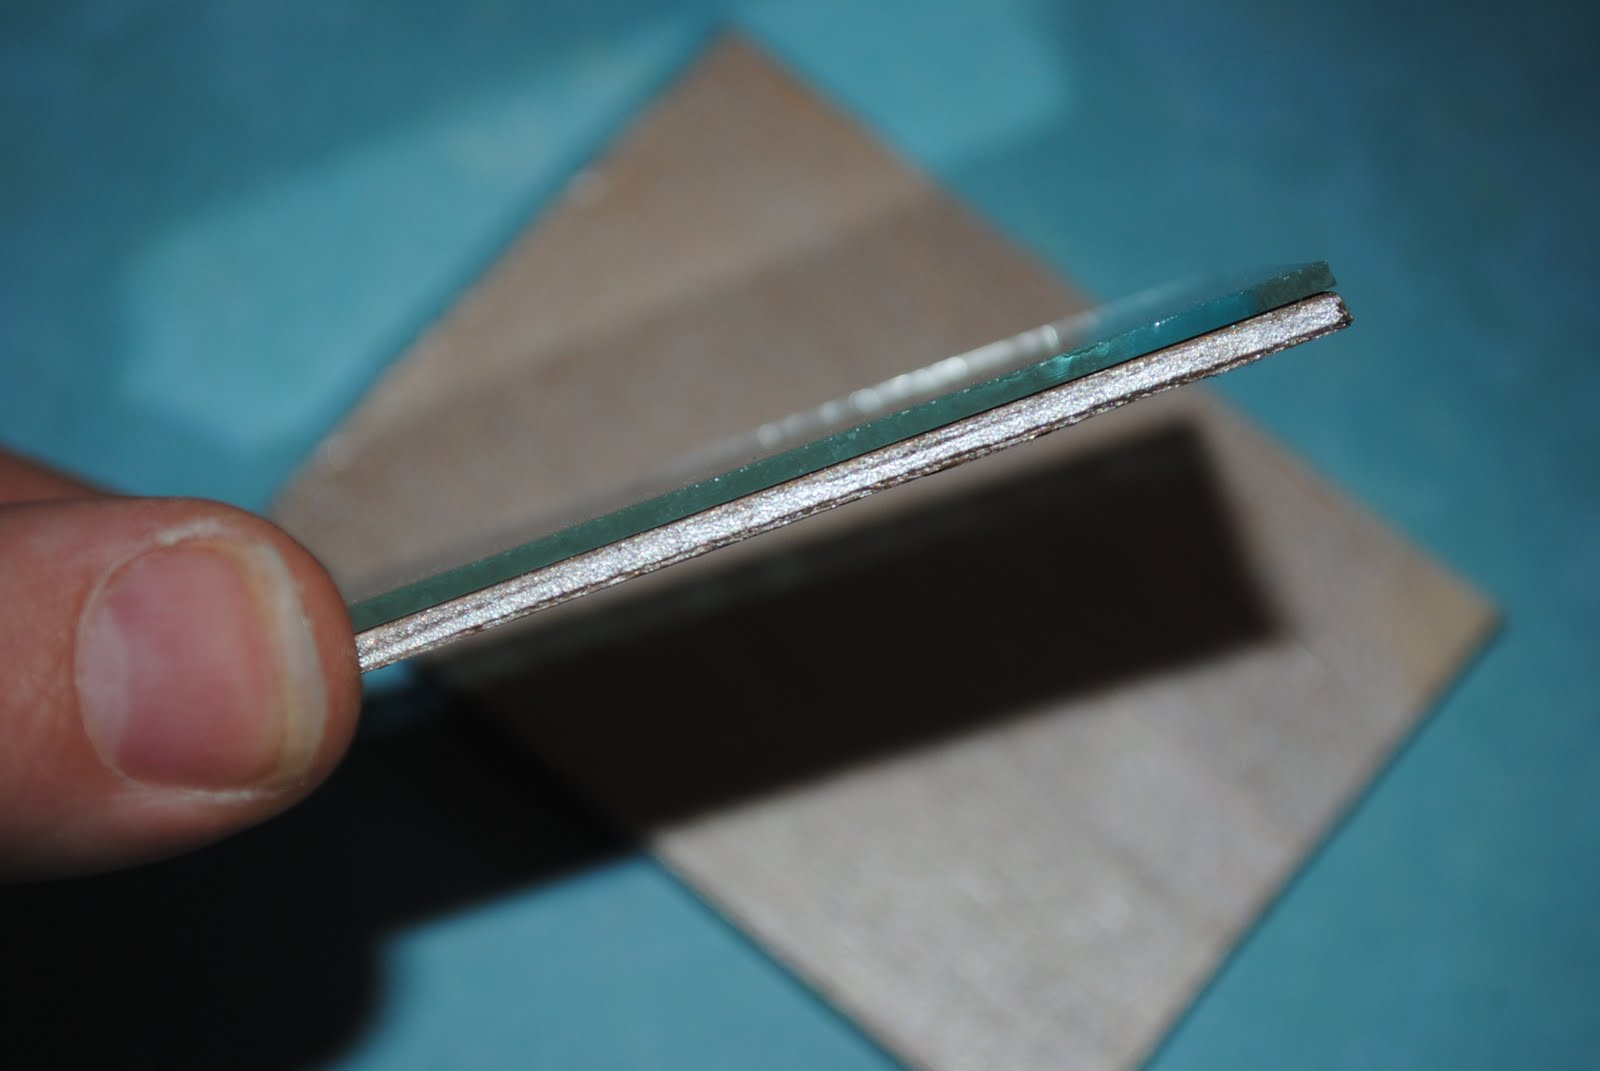
I attached the mirror pieces to the 2x3 pieces of wood. The reason I did this, was to create some height and border to the mirrors.
I then attached that to the 2.5 x 3.5 inch piece of wood that I cut out.
I nailed the sawtooth hanger on the back of the big wood circle first before I glued the mirror. This way I couldn't accidently break the mirror (knowing my luck).
We cut a circle out of a sheet of plywood measuring 15 inches in diameter. You could do it 14 inches like the mirror, but I wanted to have some extra support (a lip) to attach the mirrors to.
I then attached the mirror to the wooden circle using gorilla glue.
I also glued the embroidery hoop to the mirror. The embroidery hoop provides an edge around the outside of the mirror to glue all the other little mirrors to.
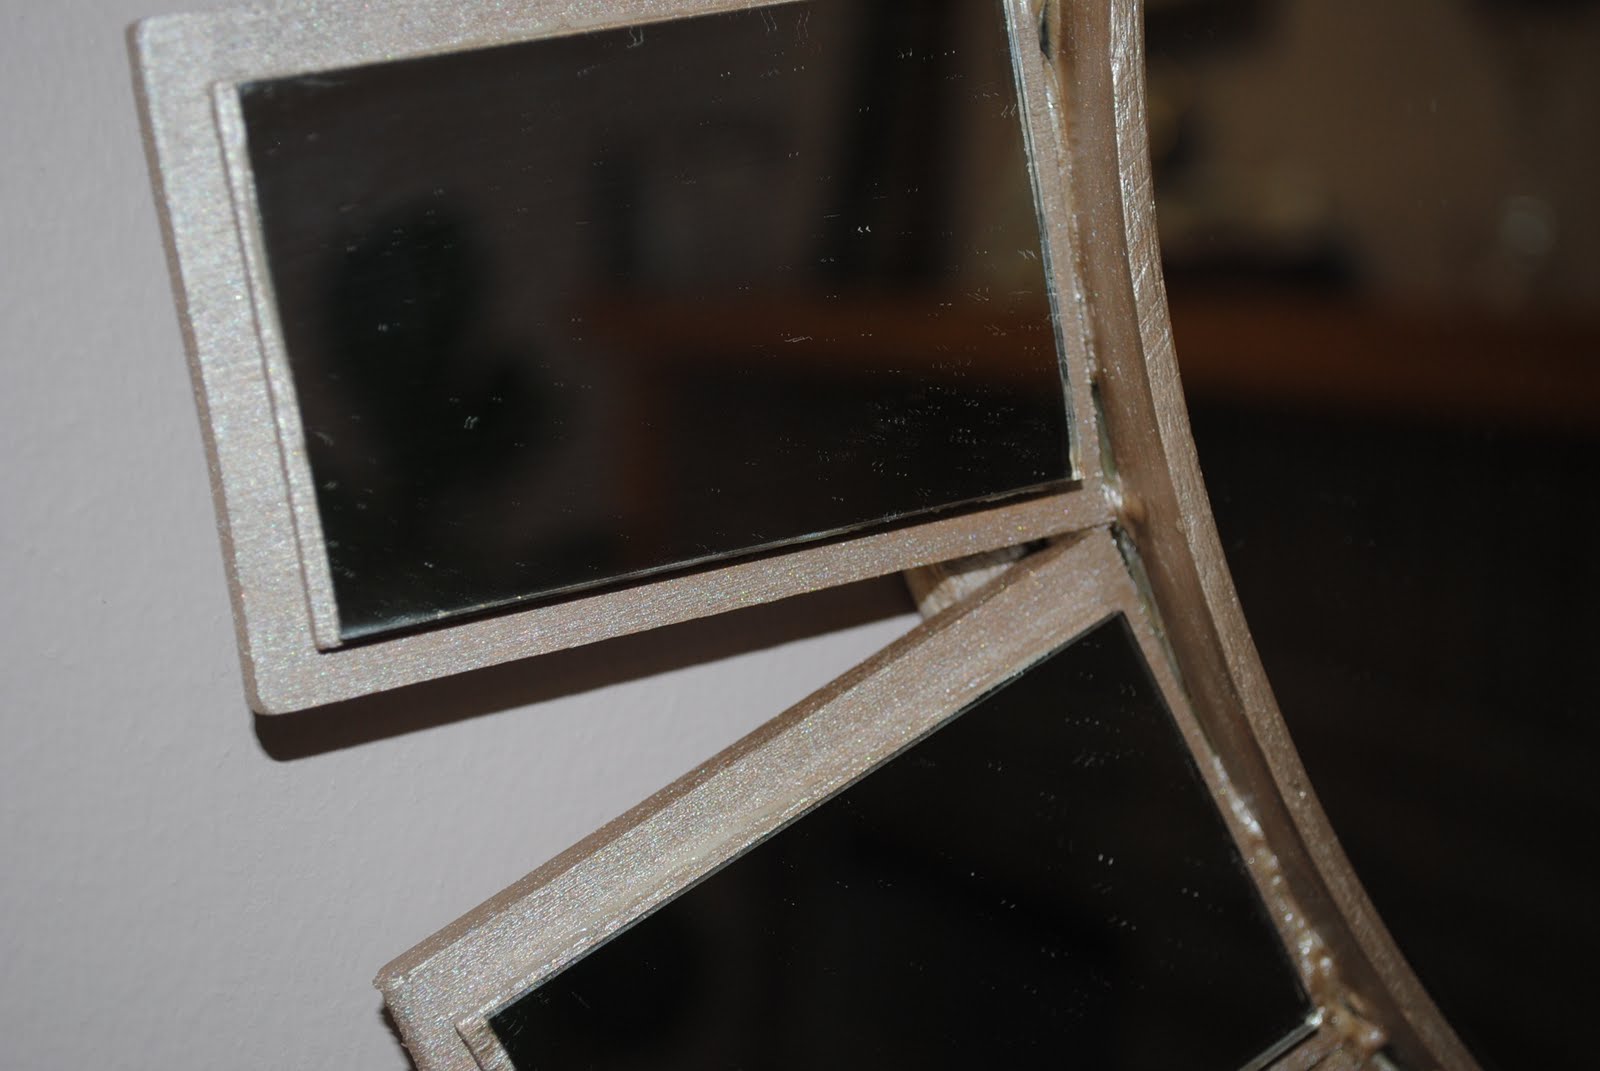
Last on the list was to attach the mirror pieces to the outside edge of the hoop. No matter how we tried, we couldn't get the circumference to divide perfectly. In this case we used 17 pieces and kept a small space between the mirrors so that it stayed symmetrical.
This is a close up of what it looks, where I attached the little pieces. I used gorilla glue to attach them. I liked using it, because it fills the extra space between the curved hoop and the flat edge of the mirrors. The gorilla glue does foam up quite a bit so be careful not to add too much.
Voila!
Hope you like it!
Linking to Centsational Girl's
Paint Stick Sunburst mirror.
Linking to
Shabby Nest and
Whisper Wood Cottage.


Beautiful Mirror! I am new to your blog! I see tons of inspiration!
ReplyDeleteWow that turned out great!
ReplyDeleteVery nice.I love this mirror and I would like to get more details...
ReplyDeleteWOW! How did I miss this post! Fabulous B!
ReplyDeleteSaw this on Remodelaholic. I have been wanting this mirror from Z Gallerie, but didn't want to pay $200. Yours looks amazing!!! I might have to try making it. Thanks for sharing.
ReplyDeleteOk, this is a total showstopper! There are a lot of sunburst mirror tutorials out there, but this one is far and away the best.
ReplyDeleteSuzy,
ReplyDeleteThank you so much for dropping me a line. I am so glad you like it and you should give it a shot. If you do try it, feel free to email it to me and I will post it. Good luck.
Drea,
You are too kind. I am quite happy with how it turned out. Thank you so much for your kind words. Also, thank you for the comment.
OH MY GOODNESS!! I just blogged about the Devon mirror and how much I NEED it!
ReplyDeletehttp://dwellrepurposed.blogspot.com/2011/06/sea-salt-and-driftwood.html
Totally out of my price range though! In my crafty little brain, I've been trying to figure out how to make this mirror! I have even been asking the lady who owns the mirror shop about glass rectangles and how much they would cost! I was hoping someone would think of a way to recreate this mirror and you have done it! You are my hero...sigh. I'm going to try it out as soon as I am caught up with my other projects which include an upholstered headboard makeover, diy curtains, diy fabric lampshades, and planters made out of pallets! Hope you'll come visit and follow me through my journey!
Hi Andrea,
ReplyDeleteI am very flattered with your comment. You are very kind. I think it is a gorgeous mirror and I was just very lucky to come across the little mirrors. I hope you do get around to making the mirror. I would love to see it when you do, so please feel free to send me a picture with it. You have a lot planned, so good luck with everything on your to do list.
are you kidding me!? that is amazing!! Definiltey a new follower of your blog! I actually just ordered that mirror...after debating on it for months, but I loved it so much! What an awesome tutorial! Congrats! :)
ReplyDeleteI love this mirror and I am dying to have one as well. I went out to get my supplies. I found square mirrors but not rectangle at michael's do you that will work.
ReplyDeleteCrystal
I love this and want to make it. Where did you get the mirror tiles?
ReplyDeleteGreat job!!